What Are The Standard Steps To Update Nameservers
In this post, you will learn the standard instructions for updating Nameservers. Nameservers are the…

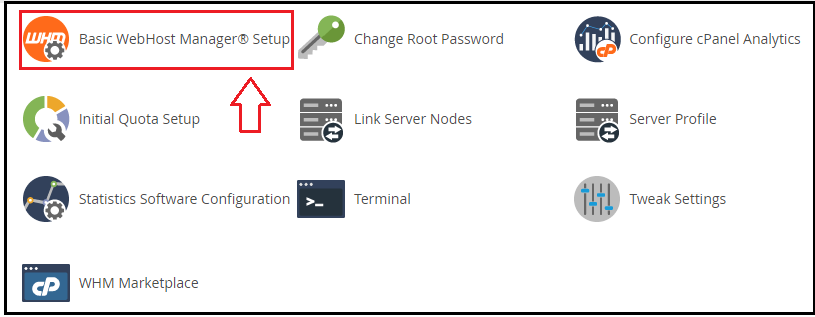
This article will be of assistance to you. In cPanel and WHM, how can you set up nameservers?
When setting up their cPanel and WHM servers, many users start by configuring their nameservers. Having your nameservers helps you to take control of your domain’s DNS and allows your users a central collection of DNS to point their domain names to while they’re hosted on your servers.
Actions to follow
Before you start, double-check that your nameservers have been registered with your domain’s registrar. This move can differ depending on your domain’s registrar, so you’ll need to contact them for specific instructions.
If you use a well-known domain registrar, you might find the following document useful in demonstrating how to do so.
Set your nameservers and IP addresses to default.
Carry out the following procedures:
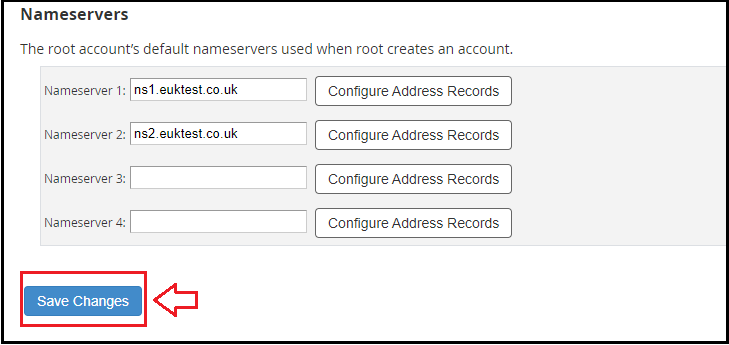
Enter a new value in the Enter an IPv6 address to create an AAAA record text box to create an AAAA record with a different IPv6 address.
For each nameserver, repeat these steps.
The name must include a prefix, a dot (. ), and your domain. A name shared by your nameservers.
We strongly advise you to use a domain that corresponds to your company’s main homepage URL.
You can refer to our documentation for a complete list of details or other concerns about this.
Explore more hosting insights, tips and industry updates.
In this post, you will learn the standard instructions for updating Nameservers. Nameservers are the…
What is the php.ini file? Php.ini file is an important configuration file of your PHP…
When setting up email for your domain, many users think about how to add TXT…