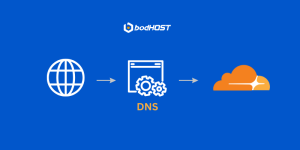
How to Transfer Domain Name with Minimum Downtime?
Follow the steps given below to get your domain name transferred with ease- Sign up…

 admin
admin
Here is a more detailed explanation of the process for adding a new domain account using your control panel.
To begin, you must first log into your main server administration control panel, which is typically WHM (WebHost Manager). This is the master panel that gives you the power to create and manage individual cPanel accounts. You will need to use your root or reseller login credentials to access it, usually by navigating to a URL like https://your-server-ip:2087.
Before you can create a new hosting account, you must first define a “package.” A package is a template of resources and limitations that you will assign to the new account. When you create a package in WHM, you set specific limits for things like disk space, monthly bandwidth, the number of email accounts, FTP accounts, and databases allowed. This ensures that each hosting account stays within its allocated resources.
This step involves assigning a package to a domain. While the term “Upgrade/Downgrade” is often used for modifying an existing account, the principle here is to ensure an account is associated with a specific package. When creating a brand-new account for an additional domain, you will simply assign the new package you created in the previous step during the account setup process. This step ensures that the new account operates under the correct set of resource limits you’ve defined.
This is the central step where you create the new hosting account. Inside WHM, you will navigate to the “Create a New Account” section. Here, you will fill out a form with all the essential details for the new domain, including:
Domain: The new domain name itself (e.g., newdomain.com).
Username: A unique cPanel username for the client.
Password: A strong, secure password for the account.
Email: A contact email address for the new account owner.
Package: You will select the package you created earlier from a dropdown list.
After filling in all the required fields, you click the “Create” button, and WHM will automatically set up the new cPanel account for your additional domain.
Once the account is created, you need to ensure the domain name points correctly to your server.
Immediately after the account is created, the domain name itself (newdomain.com) will not work yet because its DNS has not been updated. However, you can still access the new cPanel account to start uploading files or configuring email. To do this, use the server’s shared IP address in the following format:
http://YourServerIP/cpanel
Simply replace “IP Address” with the actual IP address of your server. You can then log in with the username and password you just created.
This final, crucial step is about pointing the domain’s DNS to your server. The example NS1.bodhost.com and NS2.bodhost.com refer to nameservers (NS). After you create the account in WHM, it will show you the correct nameservers you need to use.

Explore more hosting insights, tips and industry updates.
Follow the steps given below to get your domain name transferred with ease- Sign up…
To manage disk space in Plesk is simple and ensures that resources are allocated efficiently.…
Setting up DNS records for your domain in Cloudflare is one of the most important…