SQL Server Database Mirroring – A Perfect Solution for Disaster Recovery
Disaster recovery! Makes you restless, right? What if it turns into reality with your business?…

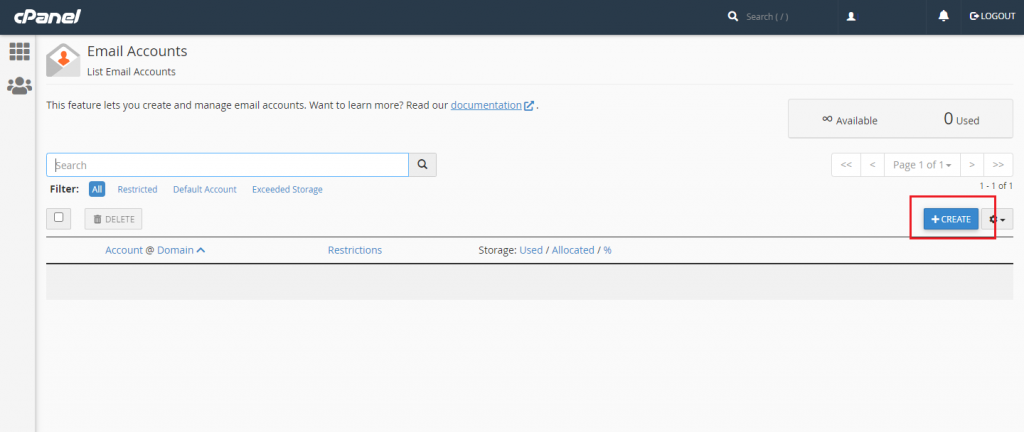
This article will guide you on how to create email accounts in cPanel, so you can use your own domain name such as ([email protected]) to send and receive emails for your website or business.
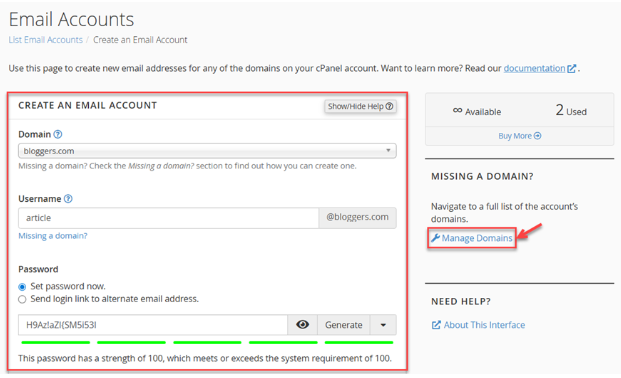
In this tutorial, we’ll learn how to create an email account through cPanel control panel. Follow the below steps to set up an email account in cPanel:

Choose Unlimited or specify the Storage Space in MB.
Use the radio button to select whether folders for Plus Addressing should be created automatically or manually.
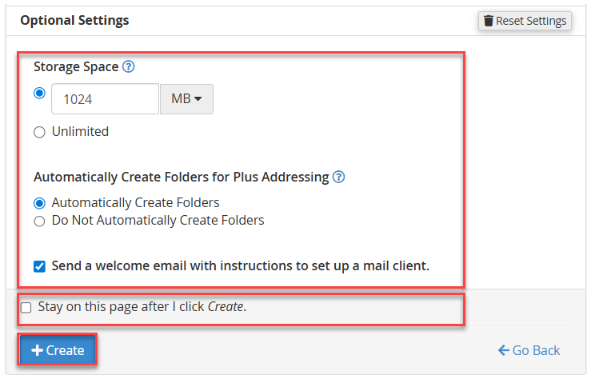

That’s how you can create an email account in cPanel.
In case you face any trouble while creating an email account within the cPanel control panel, feel free to contact our 24*7 support team through live chat or via the ticketing process.
Check out our Knowledge Base guide to learn how to import email accounts in cPanel.
Explore more hosting insights, tips and industry updates.
Disaster recovery! Makes you restless, right? What if it turns into reality with your business?…
ImageMagick is a free, open-source plugin that allows you to edit and convert photos in…
This article covers scenarios that lead to AutoSSL returning a 404 (not found) error when…