Main Features of eNlight – Auto-Scalable Cloud Computing Design
No wonder, cloud computing is considered to be the mainstream technology for most companies…

This article helps you in understanding how to check and repair a database using phpMyAdmin in cPanel.
1. Log in to your cPanel account.
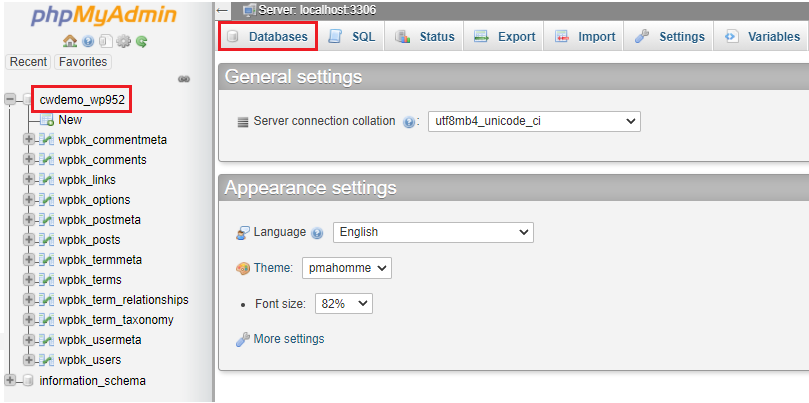
2. Click the phpMyAdmin icon from the Database section.

3. By clicking on it in the left menu, you can select the database you want to work with.
4. You can see the table as shown below.
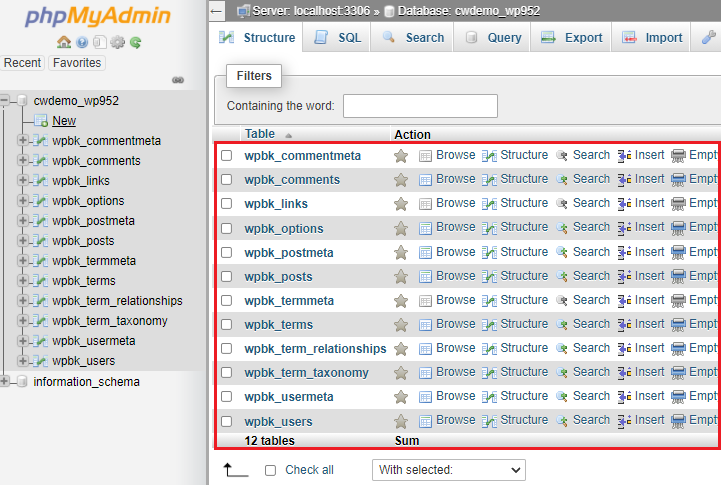
Let us see how to Check the table and then Repair it.
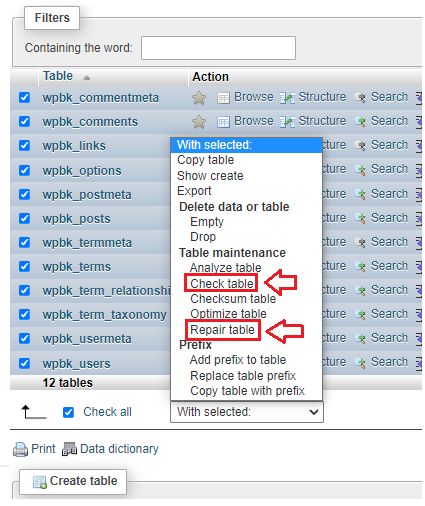
5. A list of your tables can be found on the right side of the page. Tick the small box which is just before the “Check All” option at the end of the table and then select “Check Table” from the drop-down menu as shown below.
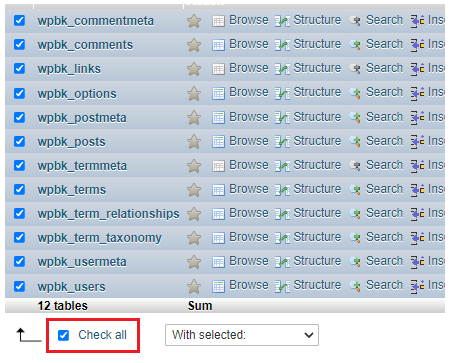
6. To repair the table tick the small box which is just before the “Check All” option at the end of the table and then select the “Repair Table” option from the drop-down menu as shown below.
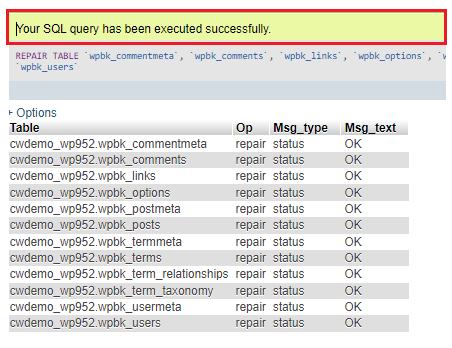
7. The page will refresh, and you’ll get a summary of the data that may have been damaged. All of the tables are in decent form, as you can see in the screenshot below. You get a success message.
In phpMyAdmin, you may check and repair a database from the Database area. I hope you understood everything perfectly. If you have any concerns, please do not hesitate to contact our support team at any point.
Read More tutorial: How to Create Table in cPanel in phpMyAdmin

Explore more hosting insights, tips and industry updates.
No wonder, cloud computing is considered to be the mainstream technology for most companies…
What is POP3 server? The POP3 stands for Post Office Protocol 3. POP3 provides…
EasyApache 4 Migration can be used in cPanel or WHM version 58 or higher. Pre-requisites…