In this article, we will explain how to configure DMARC records in cPanel for email authentication. DMARC is the protocol that uses SPF and DKIM to govern the authenticity of an email message.
Follow the simple steps to configure DMARC records in cPanel-
- Log in to cPanel.
- Select the “Domains” section and click on the “Zone Editor” sub-option.

- Select the domain and click on the “Manage” button.

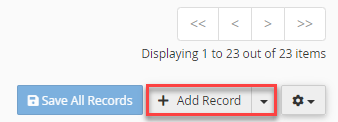
- You will enter a new page, click “+Add Record” button.

- Fill the details-
- Name- Enter the name as “dmarc”. The domain will automatically populate when you type “dmarc.”
- TTL- 14400
- Type- Select the type using the drop-down menu.
- Record- 1. Specify how recipient servers should handle emails from your domain that fail SPF/DKIM validation by choosing from the options below:
None: v=DMARC1; p=none; sp=none; rf=afrf; pct=100; ri=86400
Reject: v=DMARC1; p=reject; sp=none; rf=afrf; pct=100; ri=86400
Quarantine: v=DMARC1; p=quarantine; sp=none; rf=afrf; pct=100; ri=86400 - You have the option to request a review for an email report with unsuccessful DMARC validations by including a valid email address, as illustrated below-
None: v=DMARC1; p=none; sp=none; ruf=mailto:[email protected]; rf=afrf; pct=100; ri=86400
Reject: v=DMARC1; p=reject; sp=none; rf=afrf; pct=100; ruf=mailto:[email protected]; ri=86400
Quarantine: v=DMARC1; p=quarantine; sp=none; ruf=mailto:[email protected]; rf=afrf; pct=100; ri=86400 - Click on the “Save record” button once you fill in the details.

- You will receive a success message as shown below.

This way you can Configure DMARC Records in cPanel. If you liked our article, then you will surely love our support.
To SPF, DKIM, And DMARC configurations effectively, refer to our knowledge base on How To Configure SPF, DKIM, And DMARC Records