The DNS_PROBE_FINISHED_NXDOMAIN error means your browser can’t find the server IP address of a domain. It’s a common DNS issue but easy to fix. This guide explains what it means, why it happens, and the steps to resolve it.
What Does DNS_PROBE_FINISHED_NXDOMAIN Mean?
The Internet relies on the Domain Name System (DNS) to translate website names (like “https://www.temp.com/“) into numerical IP addresses that computers can understand. When you see the error “DNS_Probe_Finished NXDOMAIN,” it means the DNS lookup failed because the domain name could not be resolved to an IP address.
There can be the following error variations, as per the browsers:
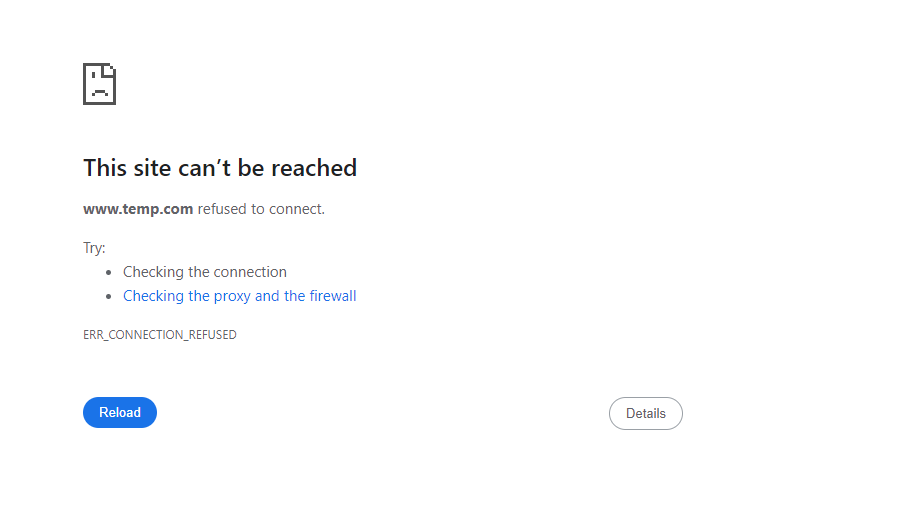
Google Chrome: “This site can’t be reached”
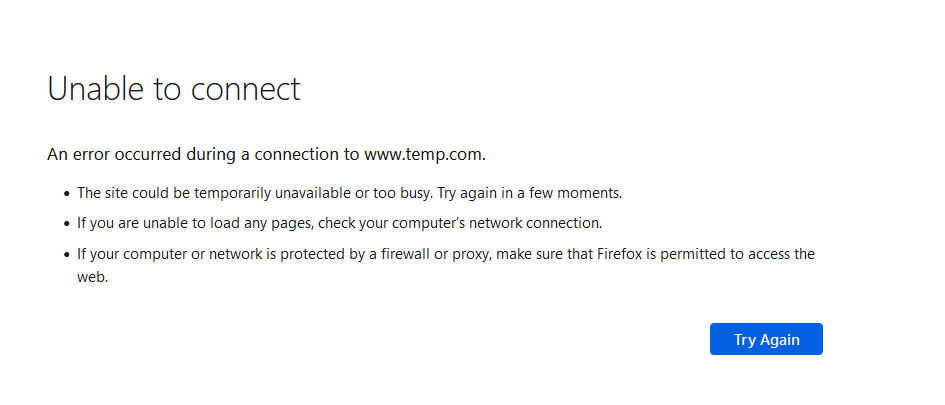
Mozilla Firefox: “Unable to connect, an error occurred during a connection”
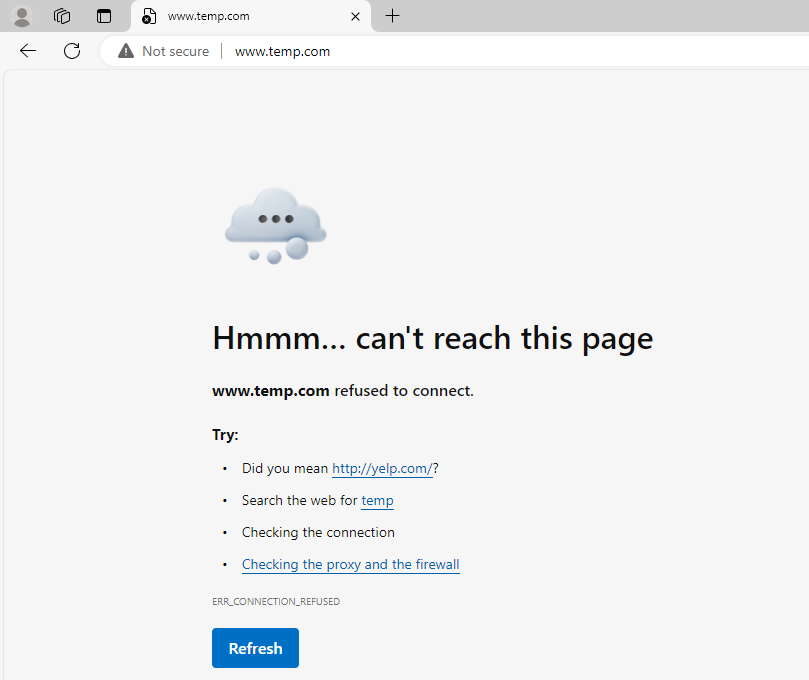
Microsoft Edge: “Hmm… can’t reach this page”
How to Fix the DNS_PROBE_FINISHED_NXDOMAIN Error:
- Check the URL: A simple spelling mistake in the domain name you entered in the address bar for any typos or misspellings, then correct any errors and try again.
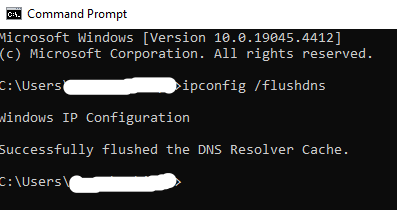
- Clear the DNS cache: Clear your DNS cache to delete any corrupted data. Open the Command Prompt (Windows) or Terminal (macOS/Linux) and enter the command:ipconfig /flushdns and then press Enter, and you will get the command of successful completion.
- Clear Your Browser Cache: The Google Chrome browser also collects the DNS cache for the websites visited. Try clearing Chrome’s DNS cache, and cookies may fix the dns_probe_finished_nxdomain error on Chrome.
- Open the browser and add the below text to the address bar:chrome://net-internals/#dns
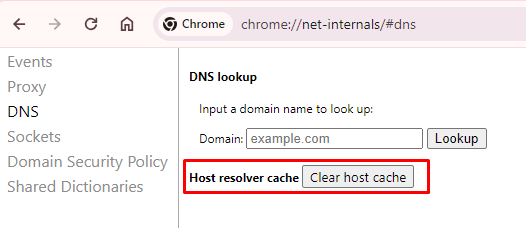
- The browser will be directed to the Internal Network Settings page of Chrome, then click on the “Clear host cache” button.
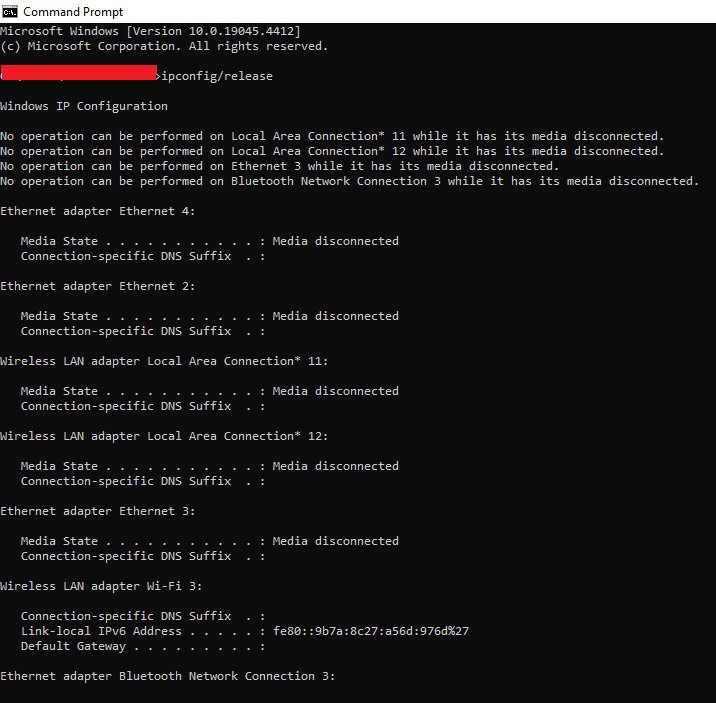
- Renew your computer’s IP address:
- First, you must release your computer’s IP to renew it. After that, renewing your IP will initiate a request to a DHCP server, which will provide you with a new IP address.
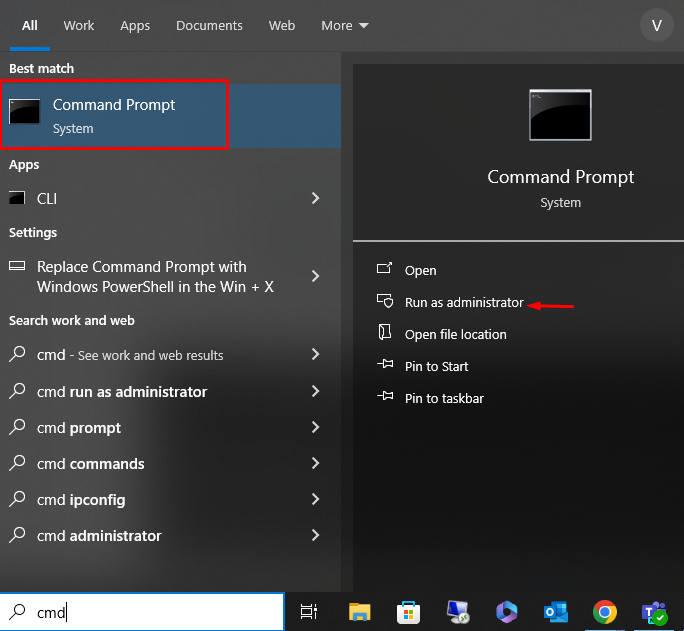
- On a Windows PC, in the search bar, type “cmd,” then choose “Run as administrator.”
 Once the command prompt screen pops up, type the command ipconfig/release and press Enter.
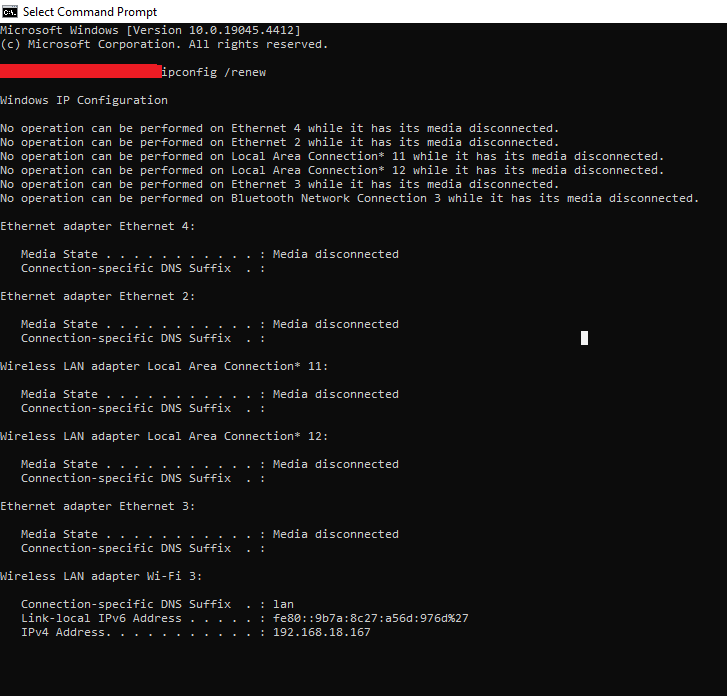
Once the current IP is released, you can ask for a new IP using the command:
ipconfig /renew.
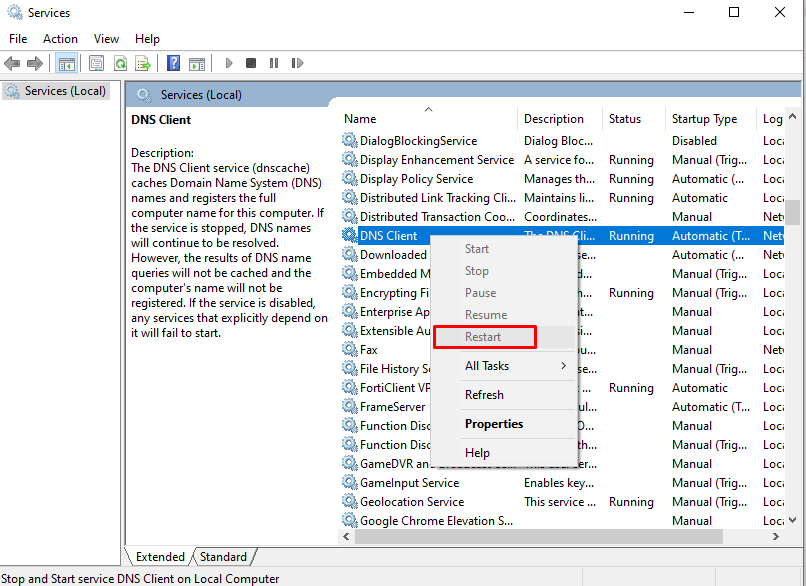
- Restart the DNS client service:
- Restarting the DNS client service can resolve the issue.
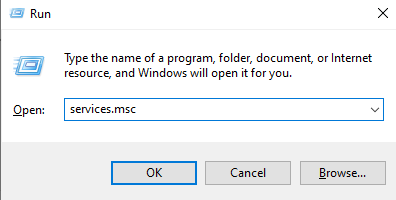
- On a Windows PC, you may click the Windows button + “R” key, and when the command line window comes up, type “services.msc.”
- All the services will be visible on a page, go down and right-click on “DNS client” and choose the “Restart” option.
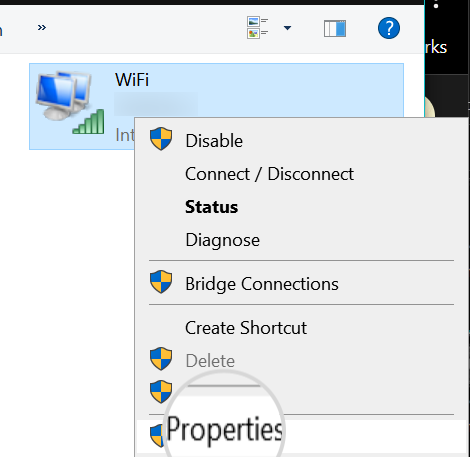
- Change Your DNS Servers: Another option is to try using a public DNS server like Google DNS or OpenDNS.
- Open the “Control Panel” in Windows.

- Select “Network and Internet” and click “Network and Sharing Centre,” then choose “Change adapter settings,” right-click on Wi-Fi, and click on Properties.
- Select “Internet Protocol Version 4 (TCP/IPv4).” Another window will load and then add a DNS server IP for Google.
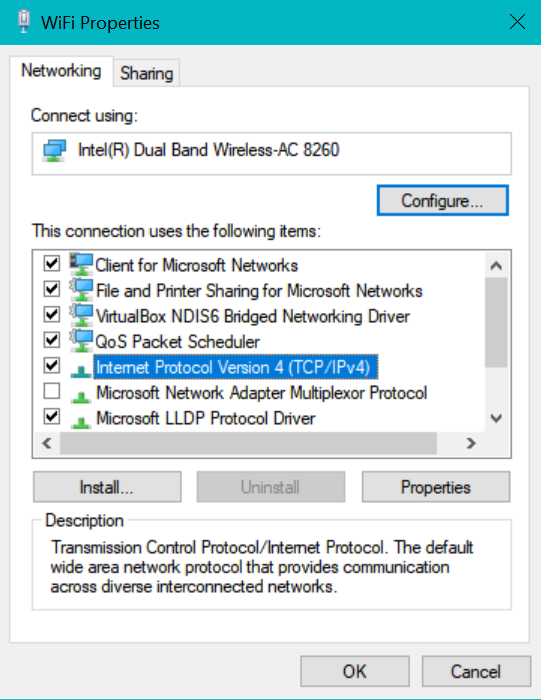
- Choose “Use the following DNS server address” after the next window pop up and type in the two IPs for Google’s public DNS server.
Note: Save any existing DNS settings for backup if you need them.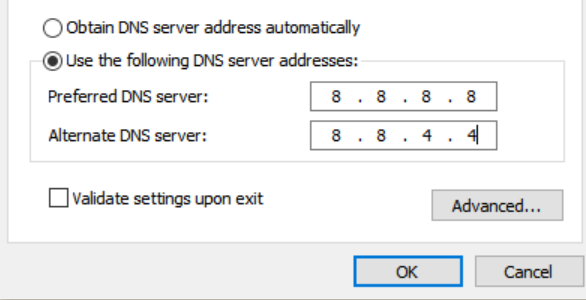
- Restart your browser after completing the process, and check if the website you are trying to reach is available.
- Restart Your Devices: Simply restart your computer, router, and modem to refresh the connection.
- Disable VPN and antivirus: Sometimes the VPN or antivirus software may be the reason for your network and DNS settings. So, try deactivating them temporarily and checking for the DNS probe error in the browser.
By following these steps, you should be able to resolve the “DNS_Probe_Finished_NXDOMAIN” error and get back to browsing smoothly. If you continue to face issues, contact our support team, and we’ll be happy to help you further.