How to Eliminate Non-Empty Directories in Linux
Eliminating non-empty directories in Linux is necessary when you need to delete both the directory…

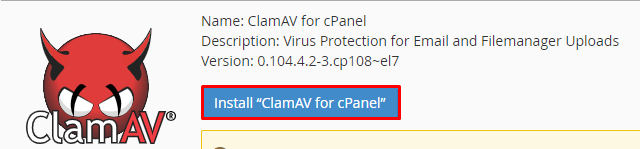
In this article, we’ll guide you through the process of installing the ClamAV plugin in cPanel. ClamAV, a popular open-source antivirus scanner, empowers cPanel users to perform email scans and assess their home directories for potentially harmful files using this plugin.
Note: To install the ClamAV, you need to have root access to your VPS (Virtual Private Server) or dedicated server, or else, you can contact your support team for help in installing the ClamAV antivirus plugin.
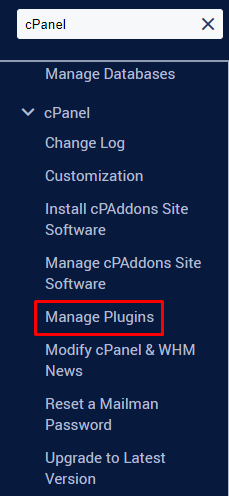
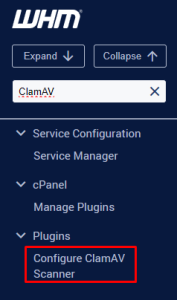
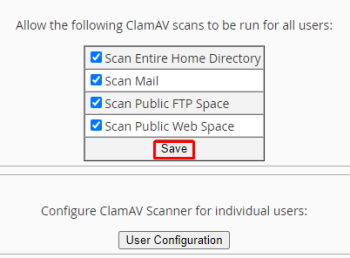
Follow these steps to install ClamAV

Explore more hosting insights, tips and industry updates.
Eliminating non-empty directories in Linux is necessary when you need to delete both the directory…
In this article, we’ll show you how to find your shared IP address in cPanel.…
The 403 Forbidden Error in WordPress indicates that the server understands the request but refuses…