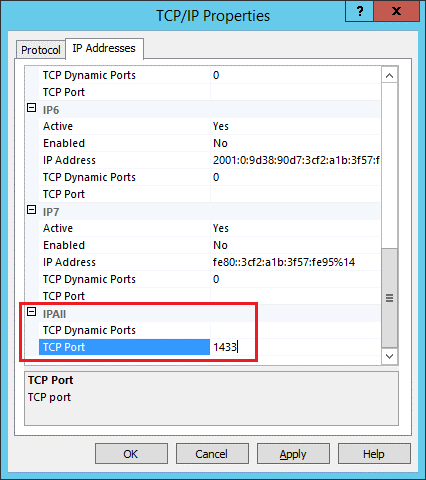
If you want to assign a TCP/IP port number to the SQL Server Database Engine. You must follow the steps given below-
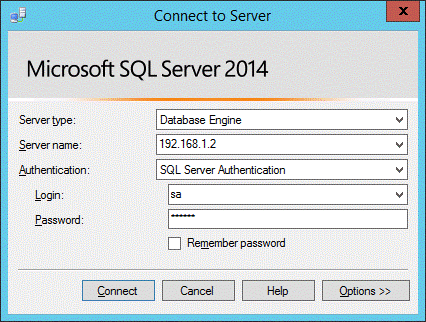
  1. Open SQL Server Management Studio and login to your database
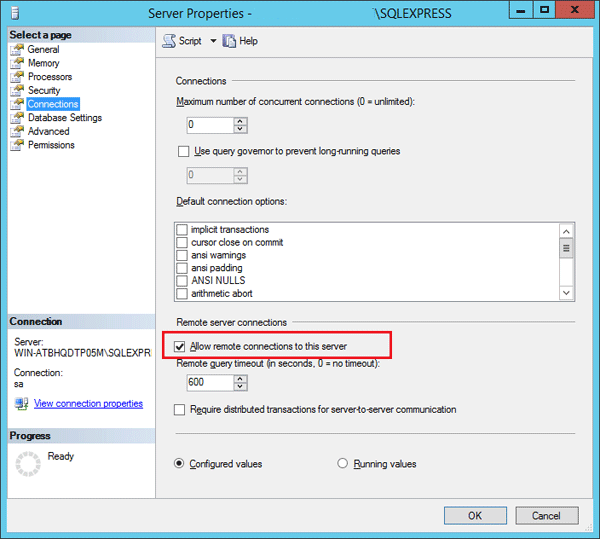
  2. Now, right-click on the server name in the left panel and choose Properties
  3. Choose the Connections page on the left side and ensure that “Allow remote connections to this server” is checked. Now exit the SQL Server Management Studio
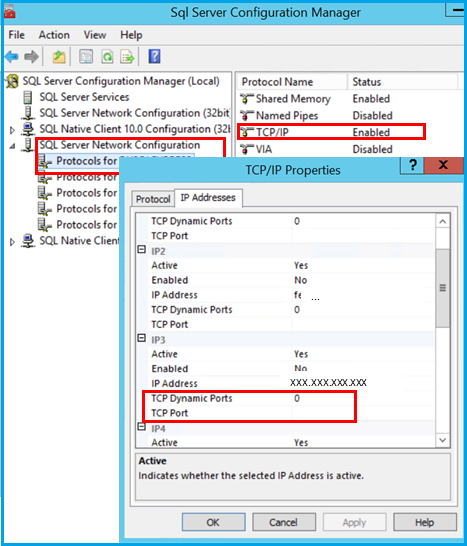
  4. Now open the SQL Server Configuration Manager and expand the node SQL Server Network Now Select Protocols for your SQL Server Instance. Ensure that the TCP/IP protocol enabled.
    MS SQL Remote Access
  5. Right-click on the TCP/IP and choose In the TCP/IP Properties dialog box, click on the IP Addresses tab and scroll down to the IPALL section. Make sure that the TCP Dynamic Ports is empty and TCP Port set to your desired TCP Port.
    SQL Injection
  6. Click the Apply button and then OK to save your changes. Once successfully done, restart your SQL Server
  7. Now you can still connect to your SQL Server Instance remotely with the help of SQL Server Management Studio.

Note:

If you still face a problem with your remote connection, it is most likely that you will have to configure your Firewall settings. Make sure that Firewall does not block your TCP Port.

Popular Posts You May Read

Explore more hosting insights, tips and industry updates.

How to add FTP Account in Plesk

How to add FTP Account in Plesk

You’ll learn how to add an FTP account in Plesk for each user in this…

How To Log into Joomla admin?

Once you install Joomla 1.5 pn your account, you are set to add the your…

How To Upgrade Your cPanel Software

This article will explain the process of updating your cPanel software to the most recent…