
IIS Fails to Start Multiple Sites on the same IP & port
This could be one of the solutions to the standard problem we are facing, that…

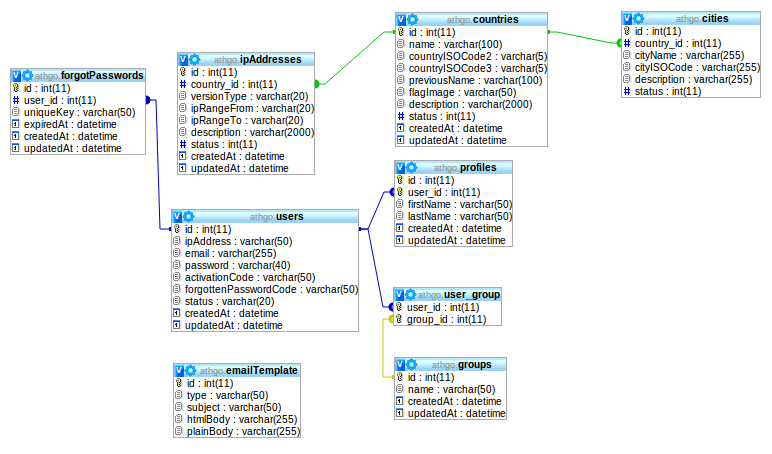
The designer mode in phpMyAdmin allows us to view databases, tables, and the various fields that form a diagram. One can also easily view the relationship between tables there. It is a very convenient mode when one often tries to design, modify, or explore database systems.
For this tutorial, we will see how to activate this designer mode in phpMyAdmin (4.1). Just for your information, this tutorial is validated under WAMP.
Activation of Designer Mode
So let’s begin, to activate designer mode we’ll start by going to find a file name as config.inc.php in the phpMyAdmin installation directory.
$cfg['Servers'][$i]['pmadb'] = 'phpmyadmin';
$cfg['Servers'][$i]['bookmarktable'] = 'pma__bookmark';
$cfg['Servers'][$i]['relation'] = 'pma__relation';
$cfg['Servers'][$i]['table_info'] = 'pma__table_info';
$cfg['Servers'][$i]['table_coords'] = 'pma__table_coords';
$cfg['Servers'][$i]['pdf_pages'] = 'pma__pdf_pages';
$cfg['Servers'][$i]['column_info'] = 'pma__column_info';
$cfg['Servers'][$i]['history'] = 'pma__history';
$cfg['Servers'][$i]['designer_coords'] = 'pma__designer_coords';
$cfg['Servers'][$i]['userconfig'] = 'pma__userconfig';

Explore more hosting insights, tips and industry updates.
This could be one of the solutions to the standard problem we are facing, that…
My Extensions screen’s layout is completely customizable by users. You can alter the “My Extensions”…
When your visitors are submitting personal and sensitive information on your website. It is necessary…