Setting up your professional (custom domain) email on your iPhone or iPad allows you to stay connected to your business or work inbox while on the move. This guide walks you through the simple steps to add your email account using the built-in Mail app on iOS.
Let us follow the guide:

  1. Gather your email settings:
    Before you begin, make sure you have the following details:

    1. Email Address (e.g., [email protected]).
    2. Password for your email account.
    3. Incoming Mail Server (IMAP or POP):yourdomain.com.
    4. Outgoing Mail Server (SMTP): mail.yourdomain.com.
    5. Port Numbers: IMAP – 993 (SSL), SMTP – 465 or 587 (SSL).
      You may get these settings from your email service provider or hosting control panel (e.g., cPanel, Plesk).
  2. Add the Account to the Mail App:
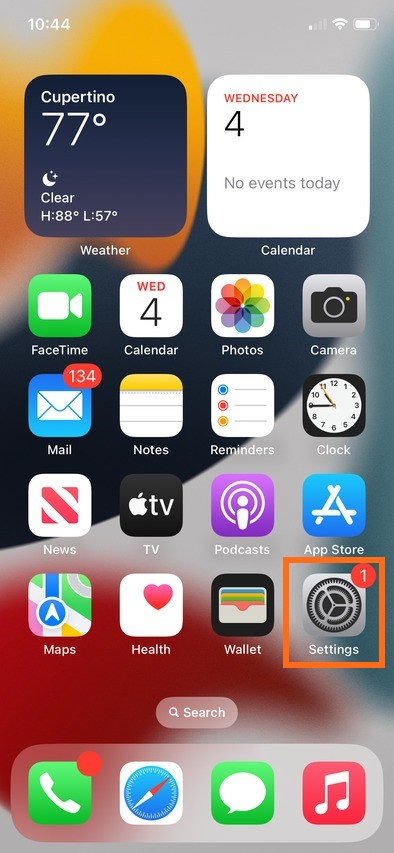
    1. Open the “Settings” on your iPhone or iPad.
      ios homepage setting
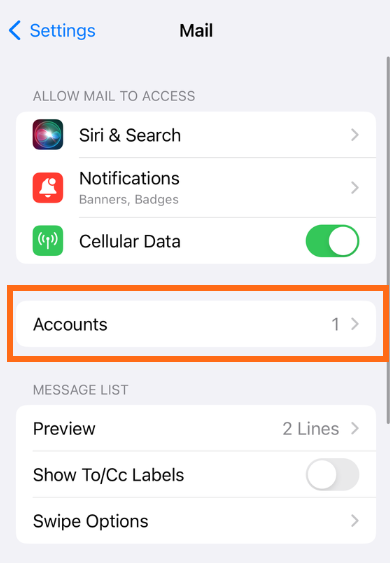
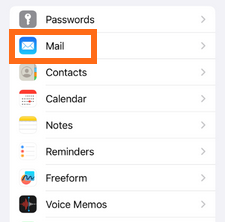
    2. Scroll down and click on “Mail > Select Accounts.”Setting Email
      Mail Account Setting
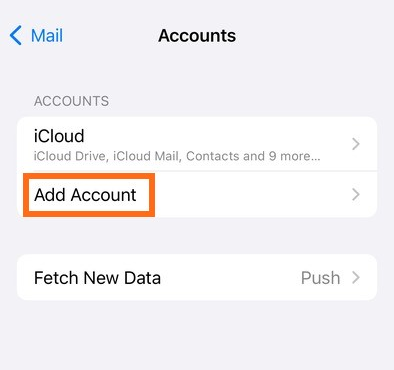
    3. Click “Add Account.”
      Setting Mail Add account
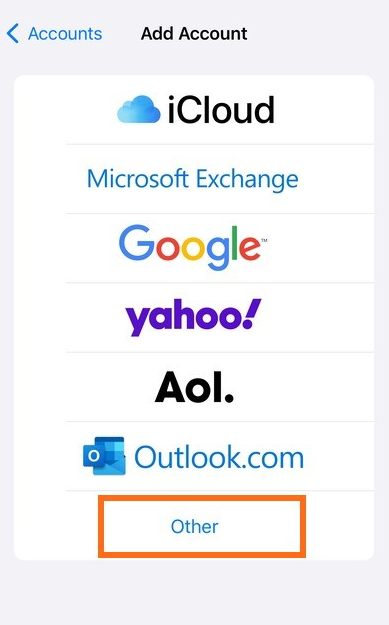
    4. Then, choose “Other > Add Mail Account.”
      Add account - other setting
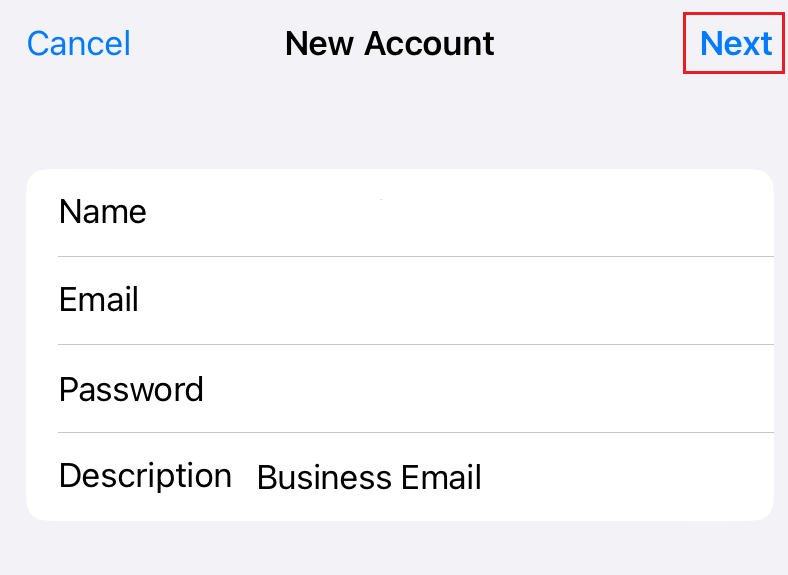
    5. Enter your name, email address, password, and a short description. Finally, click “Next.”
      New account details - Next
  3. Configure Incoming and Outgoing Server Settings:
    1. Select either IMAP or POP (IMAP is recommended).
    2. Enter the details for the Incoming Mail Server:
      • Host Name: mail.yourdomain.com.
      • User Name: your full email address.
      • Password: your email password.
    3. Enter the Outgoing Mail Server (SMTP):
      • Host Name: mail.yourdomain.com.
      • User Name: your full email address (sometimes optional).
      • Password: your email password.
    4. Click “Next” to verify your settings.
  4. Enable Mail Sync and Save:
    1. If verification is successful, you will be taken to a screen to choose what you would like to sync, and confirm “Mail” is enabled.
    2. Click on “Save” to complete the setup.

You have successfully set up your professional email on your iPhone or iPad. You can now send and receive emails using the default Mail app on iOS. If you experience any issues, your email provider’s support team can help with advanced troubleshooting.

Learn more information about how to Clear DNS Cache on iPhone or Android Devices

Popular Posts You May Read

Explore more hosting insights, tips and industry updates.

IPv4 vs. IPv6: What’s the Difference, and Which is Faster?

The internet relies on unique addresses to identify and locate devices. These addresses, like your…

WHM -litespeed and Apache

How to switch between LiteSpeed and Apache in WHM

In this tutorial, we’ll explain how to switch between Lite Speed and Apache in WHM.…

TikiWiki CMS/Groupware

Tikiwiki is a content management system, which allows you to create wiki-based websites. This application…