How To Log into Joomla admin?
Once you install Joomla 1.5 pn your account, you are set to add the your…

Keeping your Windows VPS running smoothly often comes down to routine maintenance. To schedule Windows VPS reboot it is amongst the easiest ways to prevent slowdowns, free up memory, and avoid unexpected service issues without having to go through manual restarts.
This guide walks you through the exact steps to automate reboot scheduling using a Task Scheduler. It’s written for beginners and tech users like us, ensuring you can follow it confidently.
Tip: If you’re new to Windows VPS hosting, you can also explore our Windows VPS Hosting Guide for more information.
Why Regular Reboots Matter for Windows VPS Performance
Over time, your VPS stores temporary files, stuck processes, and background services that make everything run slower. Scheduling reboots helps:
Refresh system memory
Clear minor OS errors
Improve server response time
Reduce Downtime
Keep applications running without random crashes
If you host websites, apps, control panels, game servers, or business tools on your VPS, a regular reboot cycle can noticeably improve uptime and stability.
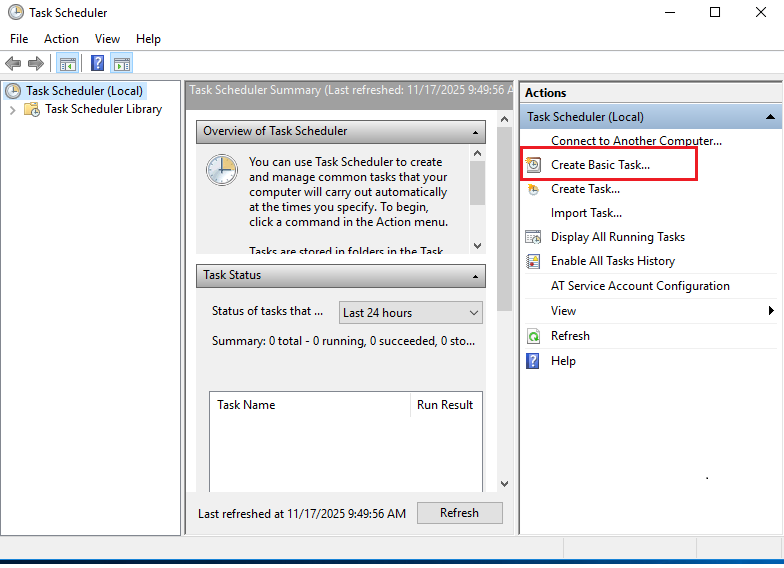
Below is the simplest and most reliable method using Task Scheduler, which is built-in into Windows.
Press Windows + R, type:
“taskschd.msc”
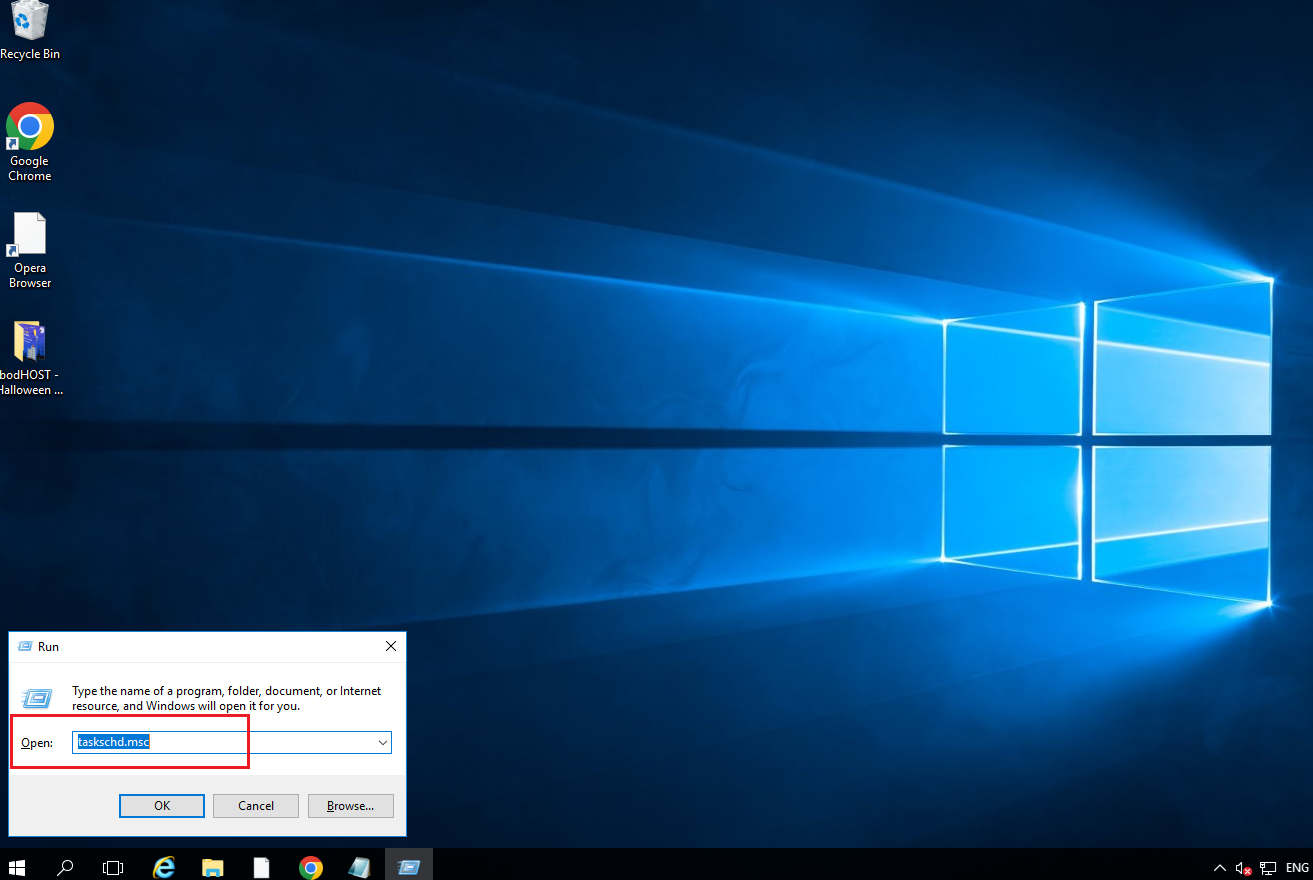
Press “Enter” or “OK” to launch Task Scheduler
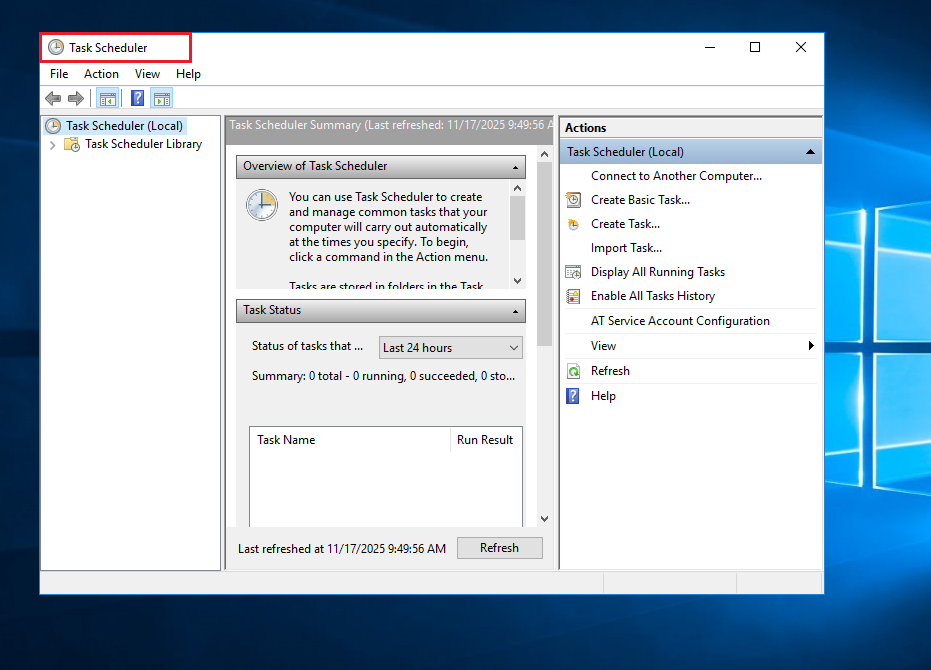
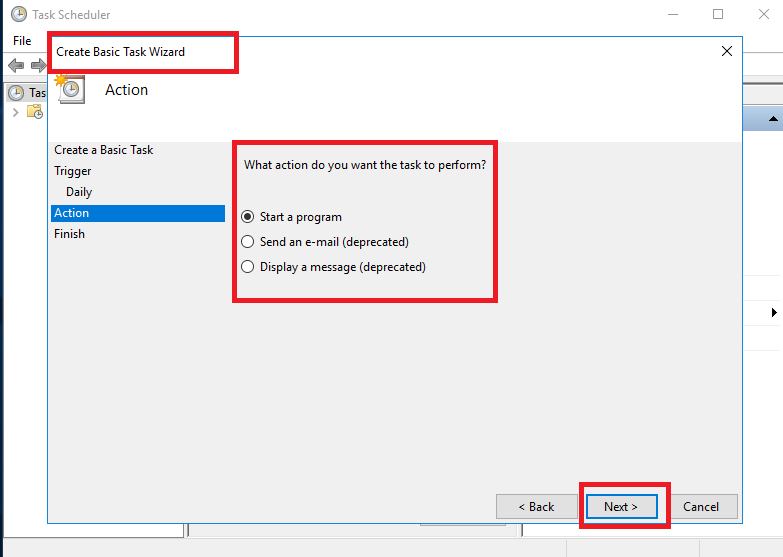
Task Scheduler allows you to schedule shutdowns, reboots, and updates, and even create your own scripts to run.
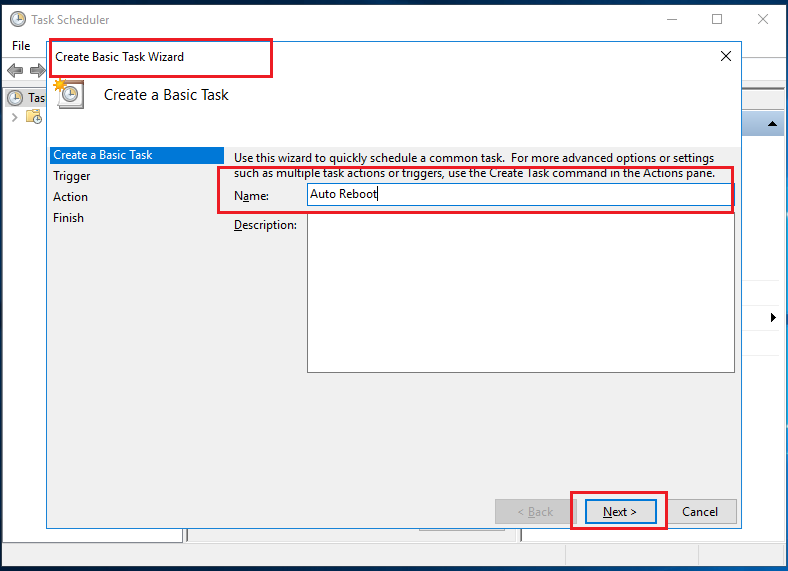
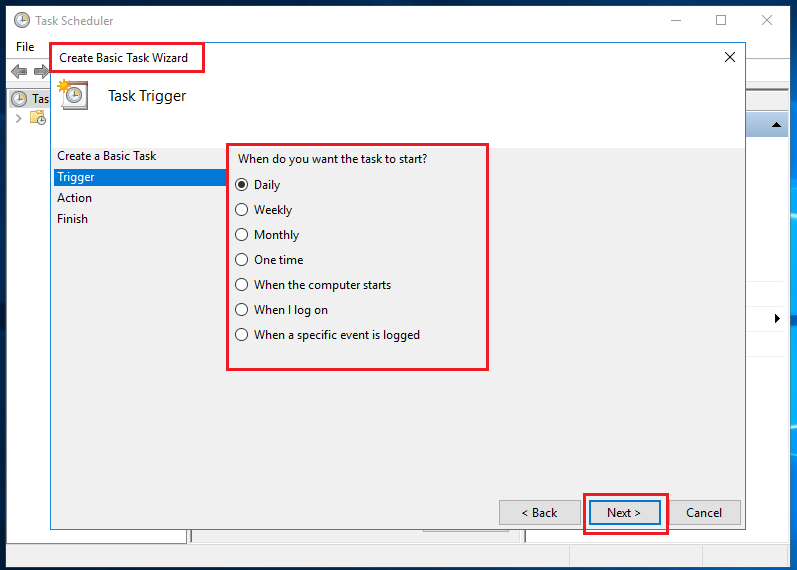

Most users schedule reboots to run during late-night hours since they avoid interruptions.
What this means:
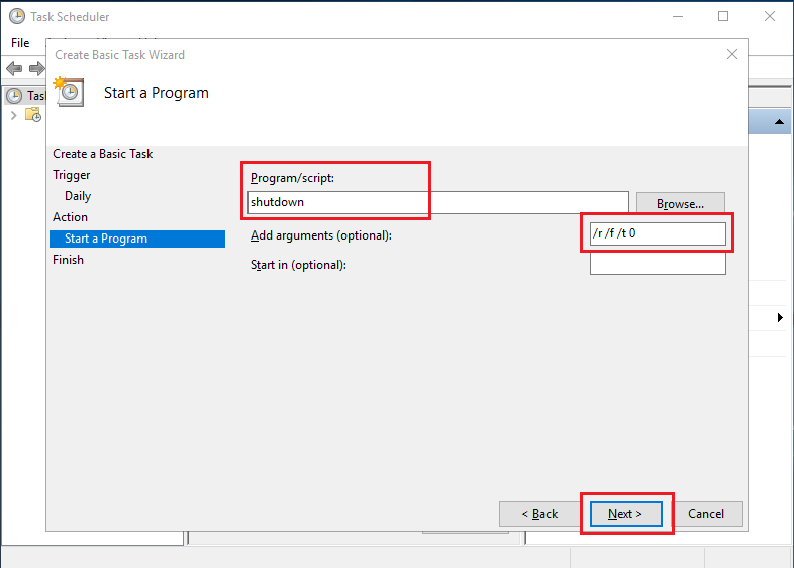
4. Click Next to apply changes.
To ensure smooth execution:
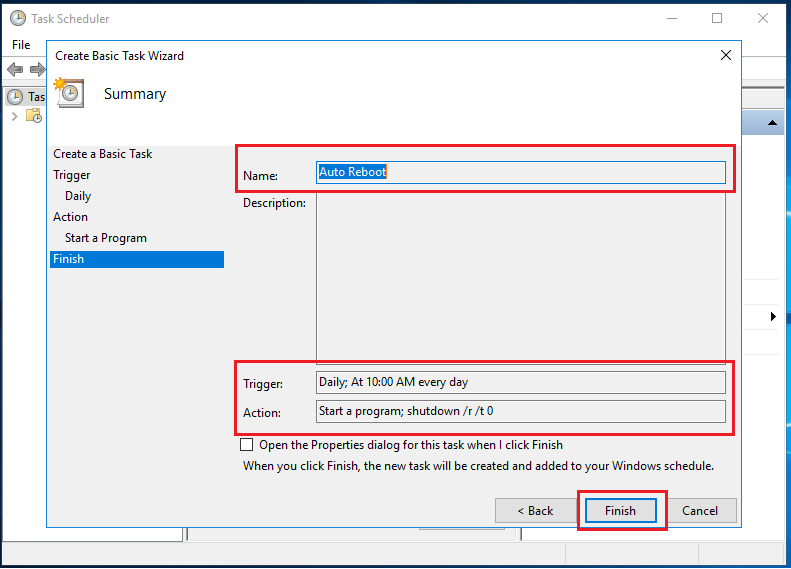
Your Windows VPS will now reboot automatically based on the schedule you set.
If you ever need to change timings or turn it off:
This comes during application updates or maintenance windows.
Here are quick checks:
If you are using bodHOST Windows VPS, our support team can help diagnose scheduling issues anytime.
Explore more guides in the bodHOST Knowledgebase
Scheduling automatic reboots in your Windows VPS is a simple practice that pays off with performance, stability, and uptime improvement in the long run. With a clean Task Scheduler rule in place, the server maintains itself, and you continue focusing on your projects.
If you need help with optimization, maintenance, or performance, the bodhost support team is available 24/7.
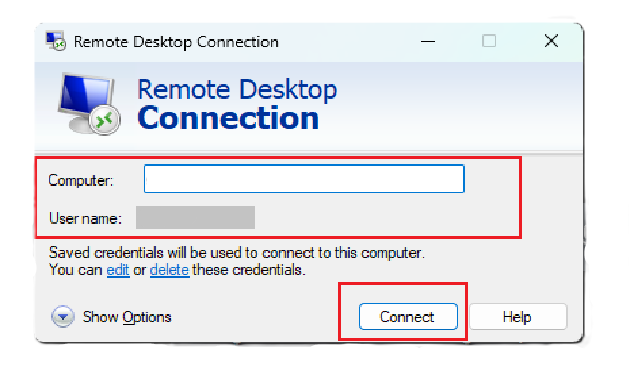
You can also, read more about connecting to a windows server using remote desktop protocol (RDP)
Explore more hosting insights, tips and industry updates.
Once you install Joomla 1.5 pn your account, you are set to add the your…
Sometimes when you use WHM’s “List Accounts” to log into a cPanel account, you can…
This article is about HTT2 and how you can enable HTT2 in WHM What is…