Types of Hosting
Shared Hosting It is a web server that has resources and space that are shared…

WP debug mode helps you identify issues inside your WordPress site by showing hidden errors, warnings, and PHP notices. Whether a plugin misbehaves, a theme update breaks your layout, or something suddenly stops loading. Enabling WP debug mode makes troubleshooting much easier.
In this guide, you will learn two ways to enable debugging with a plugin and without a plugin along with best practices and log file access.
WP debug mode tells WordPress to stop hiding errors and instead show or store them. It is helpful when:
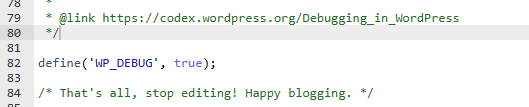
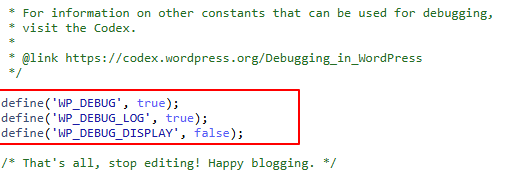
When debug mode is active, WordPress logs every warning, so you know exactly what needs to be fixed.

|
Scenario |
Best Method |
| You’re new to WordPress |
Plugin |
| You want complete control over debugging |
Manual method |
| You’re troubleshooting a broken site (wp-admin not loading) |
Manual method |
| You want quick logs without editing files |
Plugin |
| Hosting panel blocks direct file editing |
Plugin |
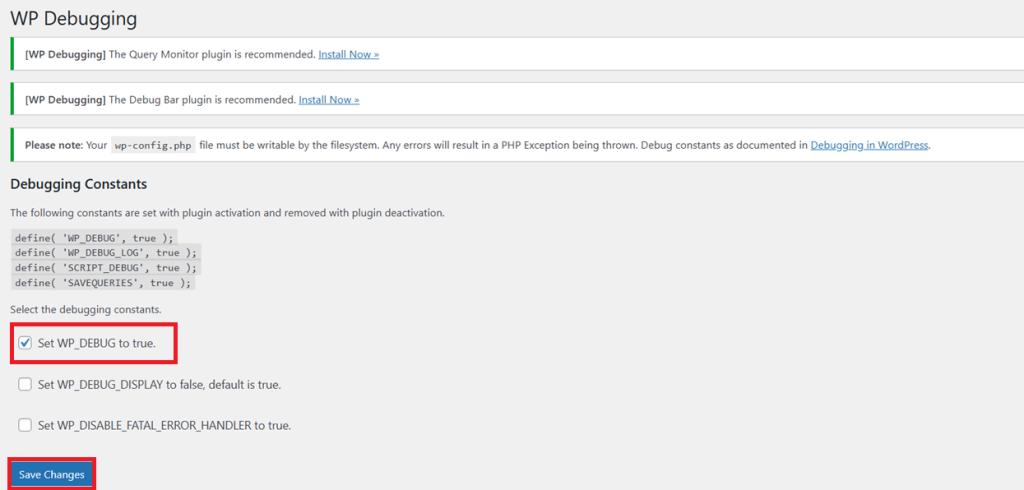
Whether you enable it manually or via plugin, always turn it off later.
define(‘WP_DEBUG’, false);
define(‘WP_DEBUG_DISPLAY’, false);
define(‘WP_DEBUG_LOG’, false);
WP debug mode is one of the simplest and most effective tools for troubleshooting WordPress errors. Additionally, you can use either the WordPress Debugging plugin or the manual wp-config method to identify the root cause of issues. Likewise, when you enable debug mode responsibly and follow best practices, you can resolve problems quickly and keep your website safe.
If you are using Bodhost, our team is always available to check your debug logs and help you fix any errors.
You can also, check out the latest guide on: How to Access and Monitor WordPress Error Logs
Explore more hosting insights, tips and industry updates.
Shared Hosting It is a web server that has resources and space that are shared…
In this article, you’ll learn how to modify your WordPress profile, To make changes to…
How To: Give users SFTP access while not having shell access Well, although most tend…