FAQ Master Flex
Almost any kind of business website can take advantage of its targeted niche market from…


 Vincer
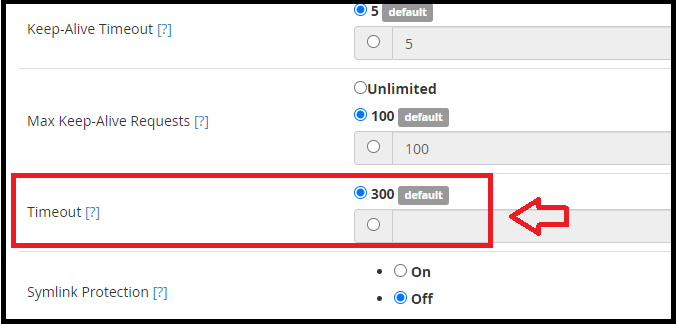
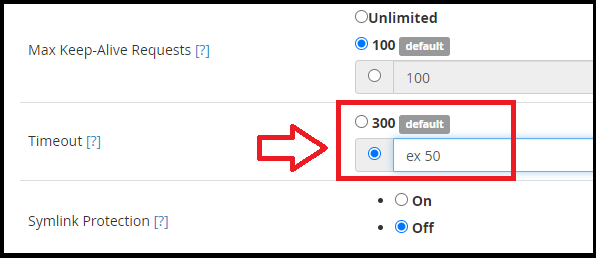
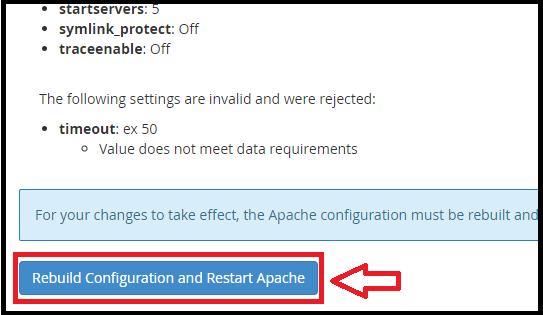
In WHM (Web Host Manager), you can configure the Apache Timeout directive through the Apache Configuration interface. Here’s a step-by-step guide:
Follow the steps as given below :
We sincerely hope that you must now have got a clear idea regarding how to configure the Apache Timeout directive via WHM. However, if you are still facing any difficulty in the procedure mentioned above, feel free to reach out to the bodHOST Team for proactive support 24×7. Check out our web hosting plans today

Explore more hosting insights, tips and industry updates.
Almost any kind of business website can take advantage of its targeted niche market from…
Sometimes, Access to cPanel and Webmail blocks firewall using standard ports (2082, 2083, 2085, 2096).…
In this article, You will learn what SSL is and how to upload SSL to…