How to Install an RPM File on Linux OS Distribution
This article explains how to install an RPM file on Linux OS Distribution. RPM (Red…

In this article, we’ll show you how to check Apache status in WHM in a few simple steps.
The Apache HTTP Server is a piece of software that helps the system operate websites on your VPS hosting. If you’re having problems with your website’s performance, you should check the Apache Status. It might be anything from delayed page loading times to a lack of connectivity.
If you check the Apache Status, you’ll almost certainly find an indication as to what’s wrong.
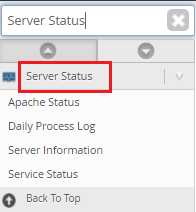
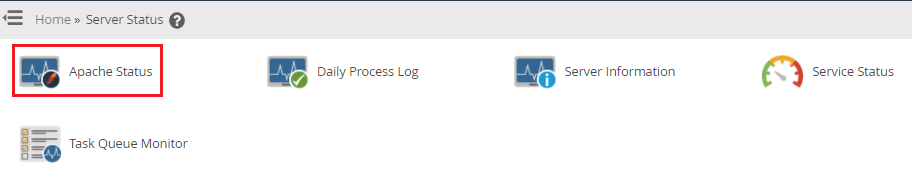
Checking the Apache Status:

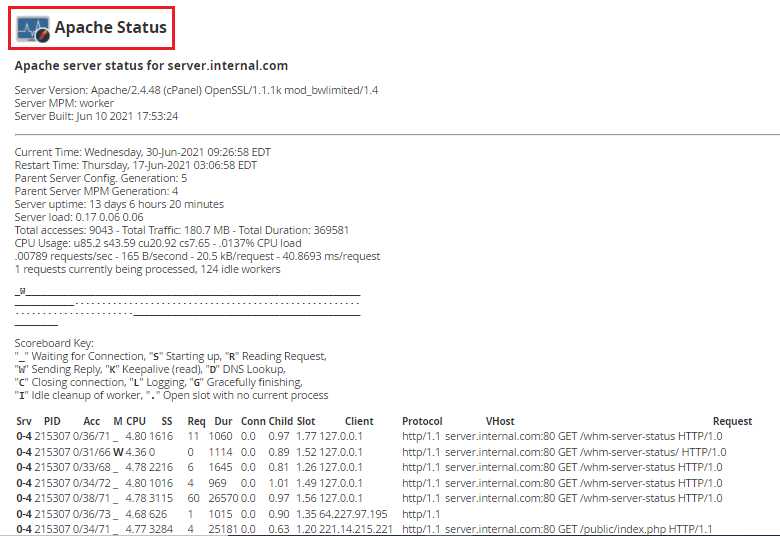
It will include all of the following information about the server’s current status:
Server Version – The Apache version that is currently executing on the server.
Server Built – The date and time when Apache was installed.
Restart Time – The time and date when the server was last restarted.
Parent Server Generation – The number of times Apache has been restarted to force it to read its configuration file again.
Server Uptime — The entire amount of time that the server has been running.
Total Accesses — The total number of client-side requests for your server.
Total Traffic — In Megabytes, the amount of web traffic that your server receives (MB).
CPU Usage — The current load percentage and overall CPU usage.
Following that is a Scoreboard that displays various information about the Apache Server’s processes.
You can review the data for any discrepancies and then contact our customer service for assistance. If you are still facing any difficulty in the procedure mentioned above, feel free to reach out to the bodHOST Team for proactive support 24×7. Check out our web hosting plans today.
Read more KB: How To Enabled The Force Apache SpamAssassin
Explore more hosting insights, tips and industry updates.
This article explains how to install an RPM file on Linux OS Distribution. RPM (Red…
Generally, considered to be an advanced firewall, CSF blocks external IPs (Inbound Connections) to avoid…
A business disaster occurs when the essential elements of a business are unable to function…