Step-by-Step Guide to Install cPanel & WHM on Your Server
When Install cPanel and WHM it will allows you to manage your web server efficiently.…

 admin
admin
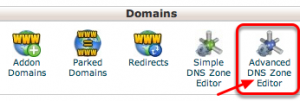
If you have any questions or face any problems with this DNS updating,
kindly contact bodHOST 24×7 chat support & we’ll get this done for you.
You can use the IP address 10.10.12.15 wherever 10.10.10.10 was
used up earlier.
The websites those are using dedicated IPs do not have to change
anything in DNS settings.

Explore more hosting insights, tips and industry updates.
When Install cPanel and WHM it will allows you to manage your web server efficiently.…
In this article, we will explain the steps to debug your Node.js applications with the…
Networking issues can disrupt even the most stable systems, but Windows’ Command Prompt offers powerful…